How to Clean an Electric Cleaning Brush Properly
7 Essential Steps on How to Clean an Electric Cleaning Brush Properly — and Make It Last Longer
If you’ve ever used an electric cleaning brush, you already know how game-changing it can be for scrubbing tiles, sinks, bathtubs, or even outdoor furniture. These smart little devices save time, energy, and elbow grease—but only if you take proper care of them. Knowing how to clean an electric cleaning brush properly is the difference between a tool that lasts years and one that burns out after a few months.
Most people forget that their cleaning tools need their own cleaning routine. Ironically, the very brush that keeps your home spotless can easily become a magnet for grime, mold, and bacteria. So today, we’re diving deep into how to clean an electric cleaning brush properly, why it matters, and how you can keep it performing like new—all while saving money in the long run.
Let’s get into the seven steps that will help you maintain your brush the right way.
1. Why Cleaning Your Electric Brush Matters More Than You Think│How to Clean an Electric Cleaning Brush Properly
Before we even get into how to clean an electric cleaning brush properly, it’s worth understanding why it’s so important.
Every time you use your electric cleaning brush—whether you’re scrubbing bathroom tiles or removing grease from the kitchen—tiny particles of dirt, soap, and bacteria cling to the bristles and the head. Over time, these residues accumulate, and that buildup can cause a number of issues:
- Reduced performance: The motor has to work harder if debris blocks the rotation.
- Unpleasant odours: Moisture trapped in the bristles can cause mildew or mold.
- Cross-contamination: Using a dirty brush to clean a “clean” surface defeats the whole purpose.
- Shorter lifespan: Internal components like the spindle or the brush head connection can wear out faster.
Think of it this way—your electric cleaning brush is like a car. You wouldn’t expect a car to run smoothly without regular oil changes, right? The same goes for your brush.
Proper cleaning ensures that you maintain optimal performance, prevent damage, and avoid having to buy replacement heads too frequently. And since most high-quality electric brushes in Malta cost anywhere between €25 and €60, keeping yours in top condition is a smart financial move too.
2. Step-by-Step Guide: How to Clean an Electric Cleaning Brush Properly│How to Clean an Electric Cleaning Brush Properly
Now let’s get to the good stuff—how to clean an electric cleaning brush properly in a way that’s simple, effective, and doesn’t risk damaging the device.
Here’s the step-by-step routine you should follow after every few uses or at least once a week if you use your brush frequently.
Step 1: Disconnect and Disassemble
Before you start cleaning, always unplug your electric cleaning brush or remove the batteries if it’s cordless. Safety comes first!
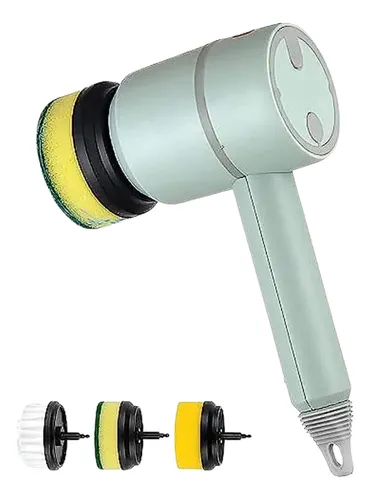
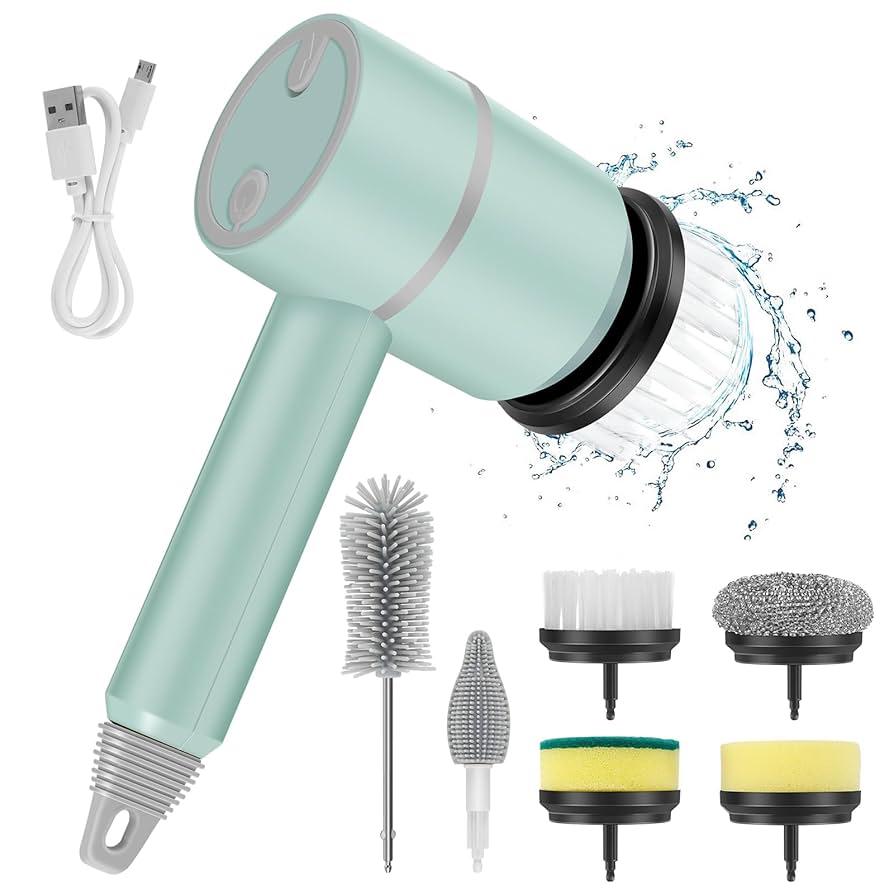
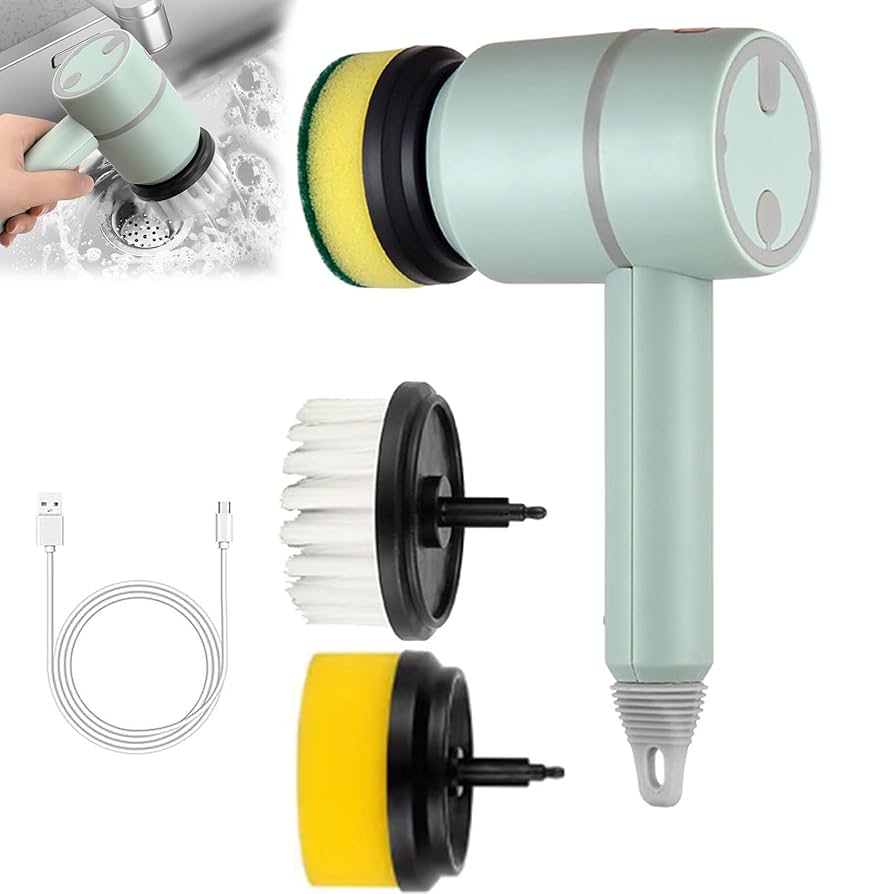
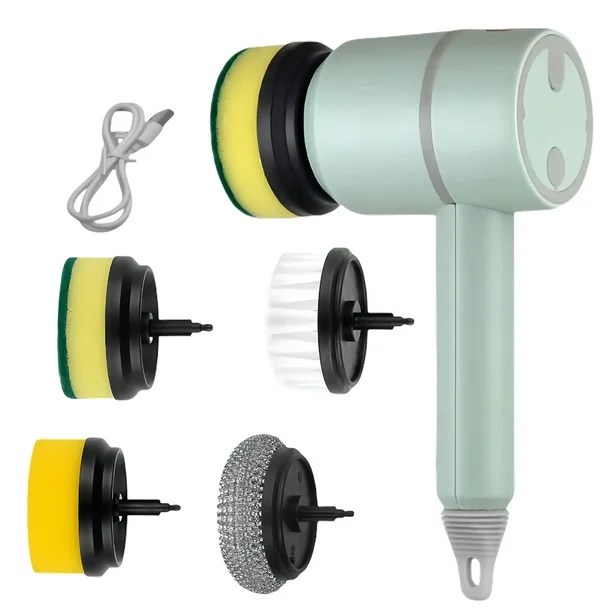
Next, detach the brush head from the handle or motor body. Most models come with interchangeable heads, so this should be as easy as twisting or clicking the head off.
If your brush has multiple detachable parts—like an extension pole or a rotating cap—remove those too. This will allow you to reach all the small areas that usually trap grime.
Step 2: Rinse the Brush Head Thoroughly
Place the brush head under warm running water. Use your fingers (or another small brush) to gently remove visible dirt, soap residue, or trapped hair.
Avoid using boiling water, as excessive heat can weaken the plastic bristles or loosen the adhesive that holds them in place.
Tip: If your brush head is heavily soiled, soak it in a bowl of warm water mixed with a few drops of mild dish soap for about 10–15 minutes before rinsing.
Step 3: Deep Clean with Vinegar or Baking Soda
For a deeper clean, you’ll want to disinfect and deodorize your brush head. Here’s how:
- Option 1: White vinegar solution
Mix one part white vinegar to two parts warm water and soak the brush head for 15 minutes. Vinegar is a natural disinfectant that kills most bacteria and breaks down grime. - Option 2: Baking soda paste
Combine two tablespoons of baking soda with a bit of water to form a paste. Rub it into the bristles using your fingers or a toothbrush, then rinse thoroughly.
Both methods are safe and eco-friendly, making them ideal if you’re conscious about sustainability.
Step 4: Clean the Handle and Motor Housing
While you should never submerge the main handle or motor unit in water, you still need to clean it regularly.
Use a damp microfiber cloth with a drop of mild detergent to wipe down the exterior. Pay close attention to areas where the head attaches to the handle, as these can trap splashes and dirt.
If your brush has small crevices, use a cotton swab or a toothpick wrapped in cloth to reach inside.
Once done, wipe it again with a clean, damp cloth to remove any soap residue, then dry with a towel.
Step 5: Dry Everything Completely
This is where many people go wrong. If you reattach a damp brush head, moisture can seep into the motor and cause rust or electrical issues.
After cleaning, place all parts—especially the brush head—on a clean towel and let them air dry completely for at least 8–12 hours.
For quicker drying, place the parts near a fan or in a well-ventilated area, but avoid direct sunlight, which can warp the plastic.
Step 6: Reassemble and Store Properly
Once everything is completely dry, reattach the parts and store your electric cleaning brush in a cool, dry place.
Avoid storing it in damp areas like bathrooms or laundry rooms where humidity is high. Instead, place it in a cupboard or hang it on a wall hook if your model allows.
Proper storage prevents mold growth and helps maintain the brush’s structural integrity.
Step 7: Replace Brush Heads Regularly
Even with perfect cleaning habits, brush heads eventually wear out. The bristles start to bend or lose stiffness, reducing their scrubbing power.
Most manufacturers recommend replacing brush heads every 3 to 6 months, depending on use.
If you notice your brush not performing as efficiently as before, it’s time to swap in a new head. You can easily order replacement parts or even a brand-new model at 4Home.mt.
3. Common Mistakes to Avoid When Cleaning Your Electric Brush│How to Clean an Electric Cleaning Brush Properly
Even if you know how to clean an electric cleaning brush properly, a few common mistakes can still shorten its life. Let’s quickly go over what not to do:
- ❌ Submerging the motor handle in water: This is the fastest way to destroy your device.
- ❌ Using harsh chemicals or bleach: These can corrode plastic parts and damage bristles.
- ❌ Reassembling while still wet: Moisture can lead to mold and affect electrical components.
- ❌ Ignoring the charging port: Always keep it dry and free from moisture.
- ❌ Using a damaged brush head: Frayed bristles don’t clean effectively and can scratch surfaces.
Avoiding these mistakes ensures your cleaning brush stays in top working condition—saving you both time and money.
4. How Often Should You Clean Your Electric Brush?│How to Clean an Electric Cleaning Brush Properly
The frequency depends on how often and where you use it.
Here’s a quick guide:
| Usage Type | Recommended Cleaning Frequency |
|---|---|
| Light cleaning (1–2 times a week) | Once every 2 weeks |
| Moderate cleaning (bathroom, kitchen) | Once a week |
| Heavy cleaning (grease, outdoor areas) | After every use |
If you live in Malta, the local humidity—especially in coastal areas—can make mildew form faster. So even if your brush looks clean, make it a habit to do a quick rinse and dry after every heavy cleaning session.
5. Bonus Tip: Keep It Fresh Between Deep Cleans
You don’t need a full deep clean every single day, but there are a few small habits that keep your electric brush fresh between sessions:
- Rinse the bristles with warm water right after use.
- Shake off excess water and let it air dry standing upright.
- Spray with a mild disinfectant (like diluted vinegar) once a week.
- Always unplug or remove batteries before storing.
These small steps take less than a minute but can add months to your brush’s lifespan.
6. Why Proper Maintenance Extends the Lifespan of Your Electric Cleaning Brush
By now, you’ve learned the exact process of how to clean an electric cleaning brush properly, but what many people underestimate is just how much of an impact regular maintenance has on the tool’s lifespan.
Your electric brush isn’t just a simple scrubber—it’s a combination of moving parts, a motor, and interchangeable heads that all need to stay in sync. Just like you wouldn’t skip oil changes on your car, you shouldn’t skip maintenance on your electric cleaning brush.
Here’s why:
a. Prevents Motor Overload
When grime or soap buildup clogs the bristles or gets trapped in the rotating mechanism, the motor has to work harder to spin. Over time, this constant strain can cause the internal gears to wear out or the motor to overheat.
By keeping your brush clean and dry, you ensure that every rotation is smooth and effortless—prolonging its life by months or even years.
b. Keeps Performance Consistent
A dirty or damp brush doesn’t clean as effectively. When bristles are stiff with dried residue or moldy from moisture, they can leave streaks or fail to remove grime efficiently.
If you notice your brush starting to leave soap scum behind or slowing down mid-use, that’s a clear sign it’s time for a deep clean.
c. Protects Against Bacterial Growth
Think about where your electric brush spends most of its time: the bathroom, kitchen, or outdoor areas—all high-moisture environments where bacteria thrive.
Without proper cleaning, these bacteria can multiply inside the bristles and even get spread around the surfaces you’re trying to clean.
Keeping your brush sanitized not only makes it last longer but also keeps your home genuinely cleaner and healthier.
d. Saves You Money
Electric cleaning brushes can cost anywhere between €25 and €60, depending on the brand and features. Replacement heads usually cost around €10–€15 per set.
If you take care of your brush properly, you won’t need to replace it—or its parts—as frequently. That’s money staying in your pocket and less waste ending up in landfills.
7. When to Replace Parts and Recognize Wear
Even the best maintenance routine won’t make your electric cleaning brush last forever. Just like any tool, it has parts that wear down naturally over time.
Here’s what you should look out for to know when it’s time for a replacement:
1. Frayed or Flattened Bristles
If the bristles have lost their original shape or stiffness, they won’t scrub efficiently. This not only reduces cleaning power but can also leave scratches on delicate surfaces.
Replace the head as soon as you notice bristles bending outward or losing texture.
2. Slower Rotation or Unusual Noise
If your electric brush starts spinning slower or making odd grinding sounds, residue may have reached the inner mechanism. Try cleaning it first, but if the problem persists, the motor or internal gears may be worn out.
3. Visible Rust or Corrosion
Any sign of rust near the metal parts or connectors indicates moisture damage. Clean immediately, but if corrosion spreads, it’s safer to replace the component.
4. Loose Connections
If the head wobbles or doesn’t attach securely anymore, it could be due to a worn-out locking mechanism. A loose head not only reduces performance but can also cause damage to the motor.
When any of these signs appear, it might be time to upgrade your brush or get new accessories. You can check for the latest models and replacement heads directly on 4Home.mt’s Electric Cleaning Brush page.
8. Expert Tips for Keeping Your Brush in Peak Condition
Beyond the standard cleaning routine, there are a few expert habits that can make a big difference. Here’s how to go the extra mile with maintenance:
✔ Always Store Upright
Keeping your brush upright helps excess water drain off and prevents moisture from seeping into the motor base. Many models come with wall mounts or stands—use them if available.
✔ Use It Only on Intended Surfaces
Your electric cleaning brush might be designed for multiple surfaces, but it’s best to avoid extreme conditions. For example, avoid submerging it in very hot water or using it with industrial-strength chemicals.
Check the manufacturer’s instructions for a list of safe surfaces—it’s worth protecting your investment.
✔ Charge It Properly
For rechargeable brushes, avoid overcharging. Leaving it plugged in overnight repeatedly can shorten the battery’s lifespan. A good rule of thumb is to unplug once fully charged.
✔ Keep Spare Brush Heads
Having multiple brush heads makes it easier to rotate them and let one set dry completely while the other is in use. This simple trick reduces mold growth and extends lifespan.
✔ Schedule Monthly Deep Cleans
Even if you rinse your brush after every use, give it one thorough deep clean each month using the vinegar or baking soda methods we discussed earlier. This ensures long-term hygiene and efficiency.
9. Can You Use Your Electric Cleaning Brush for Everything?
Now that you know how to clean an electric cleaning brush properly, it’s worth mentioning that not every surface is suitable for it.
Electric cleaning brushes are fantastic for bathroom tiles, grout, sinks, stovetops, bathtubs, and outdoor furniture, but they might not be safe for all materials. For example:
- Avoid soft plastics, high-gloss finishes, or delicate painted surfaces.
- Don’t use them on anti-fog mirrors or coated glass unless the manufacturer specifically says it’s safe.
If you’re ever unsure, test a small hidden spot first.
Want to learn more about how electric brushes work and their different designs? Check out this informative Electric Cleaning Brush article on Wikipedia for a deeper dive into the technology behind them.
10. The Impact of Proper Cleaning in Malta’s Climate
Malta’s coastal climate brings warmth and humidity—great for beach days, not so great for your electric cleaning brush. The combination of salt air and moisture can lead to faster corrosion, mold, and odor buildup if your device isn’t properly maintained.
Here are a few Malta-specific maintenance tips:
- Store your brush away from the bathroom or laundry area, as humidity levels can rise quickly.
- Use silica gel packets or moisture absorbers near your storage area to keep things dry.
- If your brush smells musty, soak the head in a vinegar solution overnight and let it air-dry completely the next day.
Regular care not only helps the brush last longer but also ensures that every cleaning session is efficient and hygienic—something every Maltese homeowner will appreciate.
11. Quick Troubleshooting Guide
Even when you know how to clean an electric cleaning brush properly, sometimes small issues pop up. Here’s how to fix them quickly:
| Problem | Possible Cause | Solution |
|---|---|---|
| Brush isn’t spinning | Residue buildup or battery issue | Clean head and charging port; recharge fully |
| Weak power | Low battery or water damage | Dry handle thoroughly and recharge |
| Strange smell | Mold in bristles | Deep clean with vinegar or replace brush head |
| Brush head won’t attach | Locking clip worn out | Replace head or connector part |
| Water inside housing | Improper drying | Disassemble, dry completely for 24 hours |
These small maintenance habits go a long way in protecting your investment and ensuring your brush stays reliable for years.
12. Where to Buy or Replace Your Electric Cleaning Brush in Malta
If your brush is beyond saving or you simply want to upgrade, you don’t need to look far. You can easily find a high-quality Electric Cleaning Brush at 4Home.mt.
They offer durable, rechargeable models perfect for both light household use and tougher cleaning jobs—plus replacement brush heads when you need them.
All prices are displayed in euros (€), and delivery across Malta is quick and reliable.
13. Contact Us for Expert Advice or Support
Still unsure about which brush model suits your needs? Or maybe you’re having trouble with maintenance? Our team at 4Home.mt is happy to help.
Whether you want personalized advice, replacement parts, or just some cleaning tips, reach out anytime through our Contact Us page:
👉 https://4home.mt/pages/contact
We’ll help you find exactly what you need to keep your cleaning tools working perfectly.
14. Final Thoughts: Clean Tools Make Cleaner Homes
It might seem ironic that your cleaning brush needs cleaning—but taking care of your tools is the key to keeping your home spotless. Once you understand how to clean an electric cleaning brush properly, you’re not just extending the life of the device—you’re making every cleaning session more effective and hygienic.
A little care goes a long way. From disassembling and disinfecting to proper drying and storage, these habits keep your brush powerful, your surfaces spotless, and your wallet happier.
Remember: your electric cleaning brush works hard for you. Give it a little attention, and it’ll keep performing like new for years to come.
✅ Check Out Our Products
Explore our collection of durable, high-performance cleaning tools and accessories—perfect for every Maltese home.
🔗 Check out our Electric Cleaning Brush and accessories here.
In summary:
Learning how to clean an electric cleaning brush properly is a small but powerful step toward saving money, improving hygiene, and maintaining efficiency. And if you’re in Malta, you can always count on 4Home.mt for trusted, top-quality products that make home cleaning easier than ever.