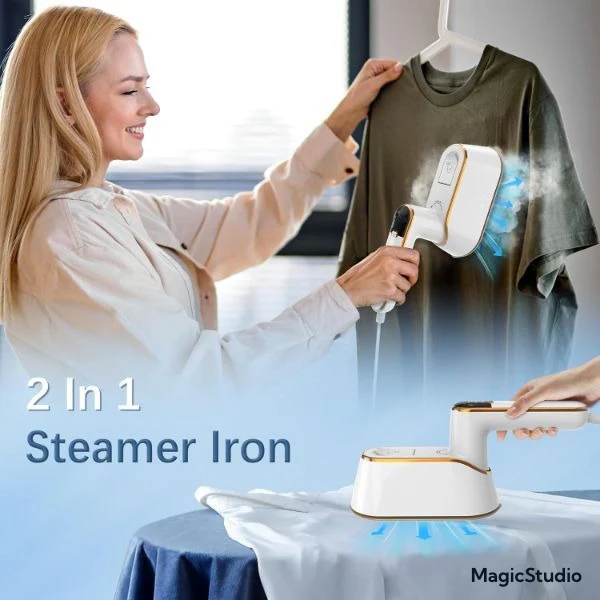
How Do You Use a Garment Steamer? A Wrinkle-Free Guide for Real Life
How Do You Use a Garment Steamer? A Wrinkle-Free Guide for Real Life
Wrinkles. The arch-nemesis of dress shirts, flowy dresses, and that blazer you swear you meant to hang up properly. If you’ve ever asked yourself, “How do you use a garment steamer?”—you’re not alone. The good news? It’s easier (and more satisfying) than you might think.
Whether you’re a total steaming newbie or just looking to level up your fabric-smoothing skills, this guide breaks it all down—no ironing board required. Get ready to ditch the scorch marks, spare yourself the ironing drama, and make your wardrobe look chef’s kiss flawless.
1. What Is a Garment Steamer and Why Should You Care?
Before we talk technique, let’s answer the bigger question: what even is a garment steamer?
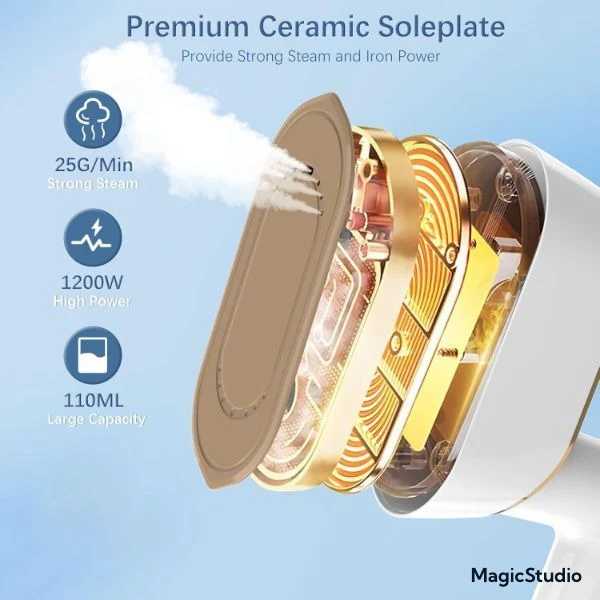
A garment steamer is a device that uses hot steam to relax the fibers in fabric, effectively smoothing out wrinkles without needing to press directly on the clothing like a traditional iron. You hang your clothes vertically, run the steamer over the fabric, and watch the wrinkles vanish like magic.
So, why choose steaming over ironing?
-
It’s faster: No setting up boards or waiting forever for preheat.
-
It’s gentler: Great for delicates, silks, knits, and “dry clean only” fabrics.
-
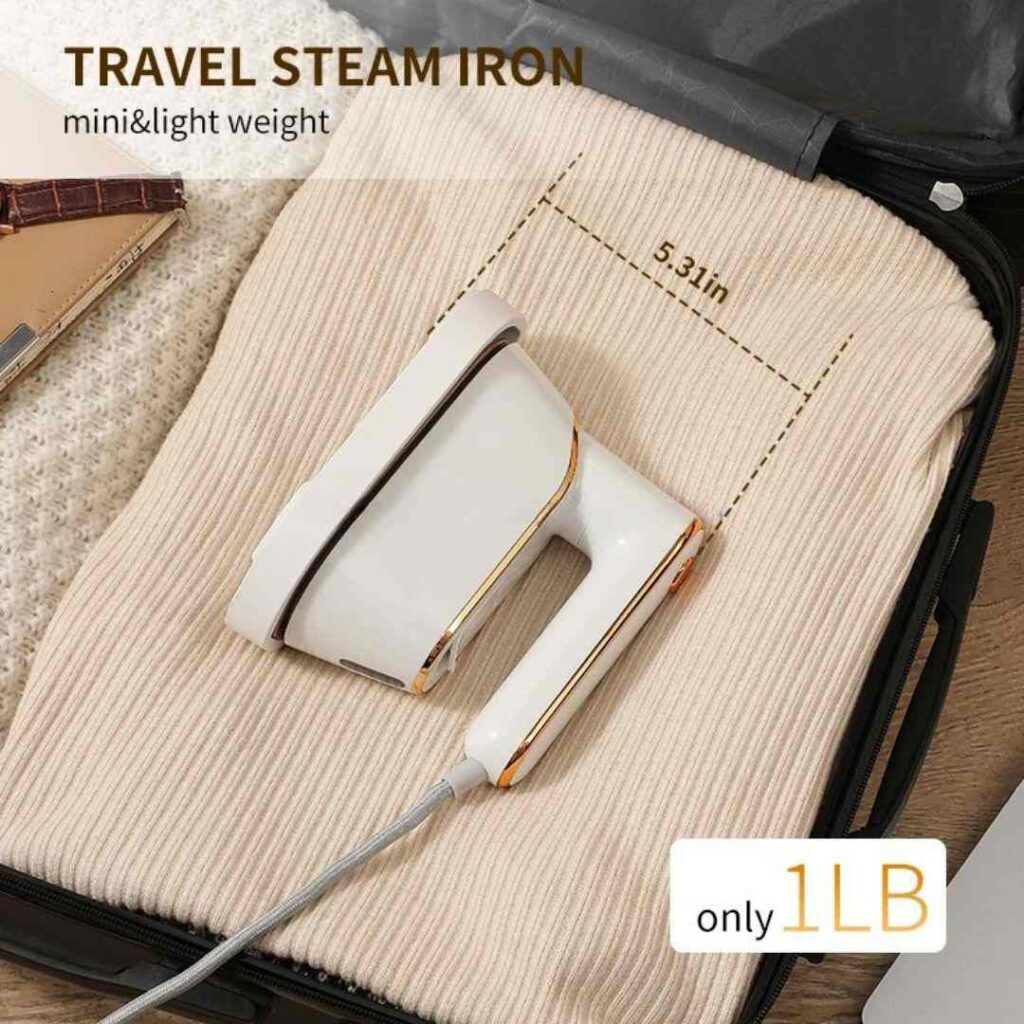
It’s travel-friendly: Especially the handheld models—hello, carry-on MVP!
-
It’s safer: No shiny burn marks or crispy collars if you get distracted.
In short: If irons are the drill sergeants of wrinkle removal, steamers are the cool yoga instructors. Same end result, way less stress.
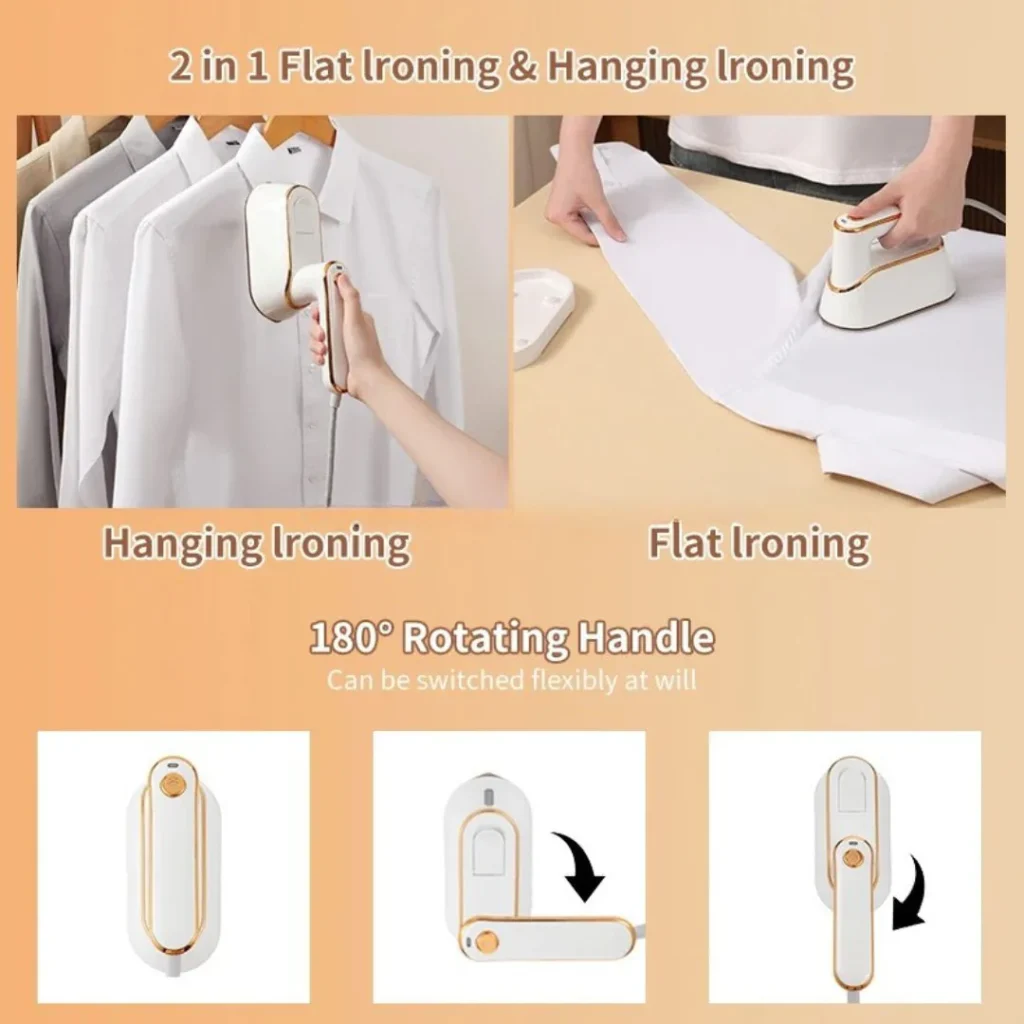
2. Types of Garment Steamers: Pick Your Weapon Wisely
If you’re asking how do you use a garment steamer, it helps to know which type you’re working with—because not all steamers are created equal.
🧳
Handheld Steamers
These are small, lightweight, and perfect for quick fixes or travel. They don’t hold much water, so they’re better for single garments or light jobs.
Pros: Portable, easy to store, heats up quickly
Cons: Smaller water tank, may need refills mid-session
🧺
Standing (Upright) Steamers
These are your at-home heavy hitters. They come with a larger water tank, stronger steam output, and built-in hangers or support poles.
Pros: Great for multiple garments or heavy fabrics
Cons: Takes up more space, slightly longer to heat
Whichever model you have, the core technique stays pretty much the same—just with a few tweaks depending on size and power.
3. How Do You Use a Garment Steamer? Step-by-Step Like a Pro – How Do You Use a Garment Steamer
Alright, let’s get into the nitty-gritty. Here’s exactly how to use a garment steamer in a way that’s safe, effective, and wrinkle-busting.
✅
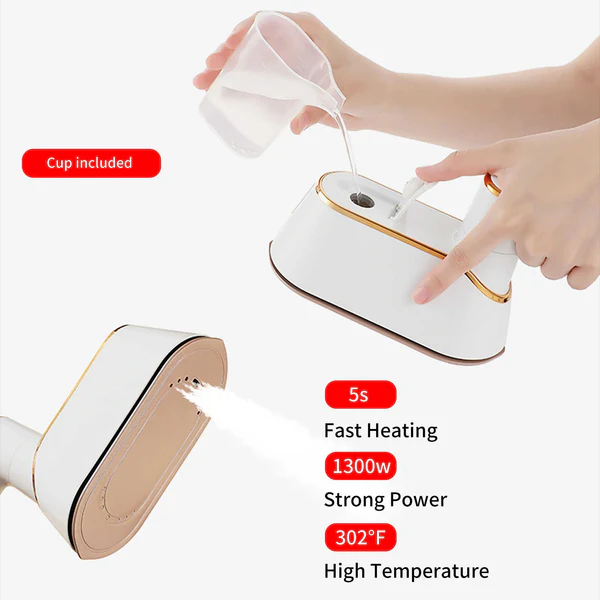
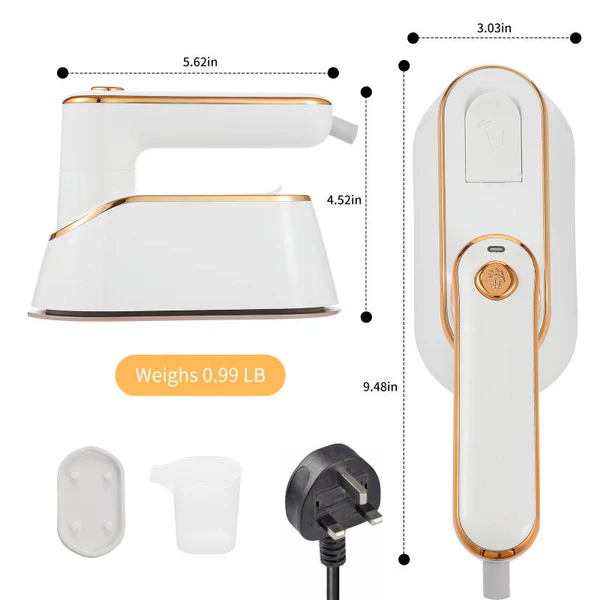
Step 1: Fill the Water Tank
Use clean, preferably distilled water to avoid mineral buildup in the tank. Tap water is okay in a pinch, but regular use might clog the steamer over time.
Don’t overfill—there’s usually a max line for a reason. (And nobody wants a surprise puddle.)
✅
Step 2: Plug It In and Let It Heat Up
Once plugged in, your steamer should heat up within 30 seconds to 2 minutes, depending on the model. Wait until it starts emitting a steady flow of steam.
Pro tip: While it’s heating, hang your garment on a hanger somewhere sturdy (like a shower rod, closet door, or garment rack).
✅
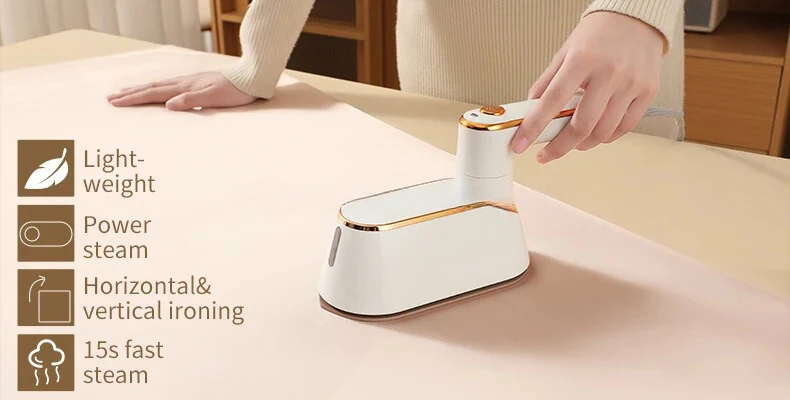
Step 3: Start Steaming From the Top Down
Hold the steamer upright, a few inches away from the fabric (usually 1–2 inches), and gently glide it downward.
-
Always steam vertically. Gravity helps relax wrinkles.
-
Use your free hand to gently tug the fabric taut—this improves the results big time.
-
Slow and steady wins. Don’t rush! Let the steam do the work.
If you’re steaming a shirt, start with the collar and shoulders, then work your way down the front, sleeves, and back.
For dresses or pants, steam the top section first, then move downward in slow, overlapping passes.
✅
Step 4: Let It Dry and Cool
The fabric might feel a little damp right after steaming—that’s normal. Give it a minute or two to dry completely before wearing or putting it away.
✅
Bonus Tips:
-
For stubborn wrinkles, hover longer over the area—but don’t press!
-
Some steamers come with a brush attachment—great for thicker fabrics like wool.
-
To freshen up clothes, give them a quick all-over steam—even if they’re not wrinkled. Steam kills bacteria and odors.
4. What Can (and Can’t) You Steam? Fabric Cheat Sheet – How Do You Use a Garment Steamer
If you’ve ever asked how do you use a garment steamer on different fabrics, you’re not alone. Here’s a breakdown of what works beautifully—and what to avoid.
👍
Safe to Steam:
-
Cotton & Linen: Wrinkle magnets, but respond well to steam.
-
Silk & Satin: Be gentle and keep the steamer moving—don’t hover too long.
-
Polyester & Synthetics: Steam away! These love quick touch-ups.
-
Wool & Cashmere: Works great. Use a brush attachment if available.
-
Blends: As long as there’s no leather or suede in the mix, you’re golden.
🚫
Avoid Steaming:
-
Leather & Suede: Steam + these = damage. Hard pass.
-
Velvet: You can, but do it carefully and only at a distance. No pressing.
-
Structured garments with interfacing: Think blazers or suit jackets—some can warp with too much moisture.
Always check the care label first. If it says “Do not steam,” trust it.
5. Common Steaming Mistakes (and How to Avoid Them)
So you know how do you use a garment steamer—but even the best of us make rookie mistakes. Here’s what to look out for (and how to fix it fast).
❌
Mistake 1: Pushing the Steamer Against the Fabric
Don’t do it. Steam is most effective when it can circulate and relax the fibers. Pressing can leave wet spots and may damage delicates.
✔️ Fix: Hold the steamer slightly away from the fabric and let it hover.
❌
Mistake 2: Overfilling the Water Tank
Too much water = leaks, sputters, and sad steam output.
✔️ Fix: Stick to the fill line. And always empty leftover water after use to prevent mold or buildup.
❌
Mistake 3: Using Tap Water Long-Term
Minerals from tap water can clog the steamer over time and reduce performance.
✔️ Fix: Use distilled water whenever possible, especially if you live in a hard water area.
❌
Mistake 4: Skipping a Fabric Test
Different fabrics react differently to steam, and some need extra care.
✔️ Fix: Test on an inconspicuous area first, especially for delicate or expensive garments.
6. Steamer vs. Iron: When to Use Which – How Do You Use a Garment Steamer
Sometimes people ask not just how do you use a garment steamer, but also when should you use it instead of an iron?
Here’s the quick rundown:
|
Use a Steamer When: |
Use an Iron When: |
|---|---|
|
You’re in a hurry |
You want sharp creases |
|
You’re dealing with delicates |
You’re pressing thick cotton |
|
You hate ironing boards |
You need structure |
|
You’re traveling |
You need heavy-duty wrinkle removal |
Best-case scenario? Own both, and choose based on the garment. That’s what the pros do.
7. FAQs: Quick Answers to Steamy Questions – How Do You Use a Garment Steamer
Q: Can I steam clothes while they’re still damp?
A: Technically yes—but results may vary. Steaming already-wet fabric doesn’t do much unless you’re using it to sanitize.
Q: Can I use a garment steamer on curtains or upholstery?
A: Absolutely! Just be careful with delicate or vintage fabrics. Steam is great for freshening and wrinkle release.
Q: Is steaming safe for embroidered or beaded clothes?
A: Yes, but always steam from the inside out to protect embellishments.
Q: How often should I clean my steamer?
A: If you use it regularly, give it a deep clean once a month. Flush it with vinegar and water to prevent scale buildup.
Final Thoughts: So, How Do You Use a Garment Steamer Like a Pro?
Easy: You fill, hang, heat, hover, and let the steam work its magic.
Learning how do you use a garment steamer isn’t just a laundry tip—it’s a life upgrade. Whether you’re getting ready for a big meeting, freshening up travel-worn outfits, or just avoiding the iron like the plague, a garment steamer is your trusty shortcut to looking sharp.